Handheld Laser Welding Machine: Complete Guide for Beginners (2026)
Ultimate Safety, Setup & Operation Handbook for First-Time Users
1. What Is a Handheld Laser Welder?
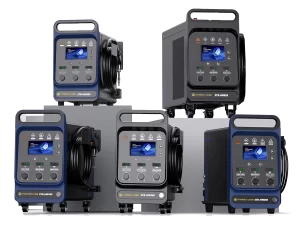
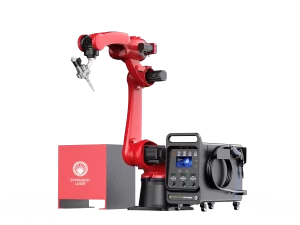
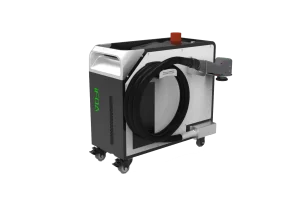
A handheld laser welding machine is a portable, high-efficiency metal joining tool powered by a 1080 nm fiber laser (Class 4 laser). It uses a flexible welding gun to deliver focused laser energy, creating clean, strong welds with minimal heat distortion.
Ideal for small workshops, on-site repair, DIY projects, and small-batch manufacturing.
2. Top 5 Advantages for Beginners
- Easy to learn: Basic welding in 30 minutes with preset modes
- Clean welds: Almost no grinding or polishing required
- Low heat distortion: Perfect for thin metal sheets
- High portability: Works indoors, outdoors, and in tight spaces
- Stable quality: Less skill-dependent than MIG/TIG welding
3. Critical Safety Basics (Class 4 Laser)
This machine is Class 4 laser equipment — the highest risk level in laser safety standards.
- Direct or reflected laser causes permanent eye damage
- High temperature leads to skin burns and fire risks
- Invisible 1080 nm laser is extra dangerous (no visual warning)
- Unauthorized disassembly causes serious electric shock hazards
 | Sichuan Strongest Laser Technology Co., Ltd")
4. Must-Have PPE & Safety Gear
| Equipment | Requirement |
| Laser Safety Glasses | OD ≥ 6, protect 1080 nm wavelength |
| Welding Gloves | Heat & splash resistant |
| Safety Shoes | Anti-smash & anti-slip |
| Respirator | For welding fumes and dust |
| Protective Clothing | Full skin coverage |
5. Safe Workspace Setup
- Clear all flammables (oil, cloth, paper, plastic)
- Install fire extinguisher within easy reach
- Good ventilation or fume extraction system
- Gas cylinders fixed upright, away from heat
- Use safety interlocks and warning signs
- Keep machine cooling vents unblocked
6. Step-by-Step Operation Guide
6.1 Pre-Use Inspection
- Check power, ground, cooling system, and gas lines
- Clean or replace protective lenses
- Prepare clean workpiece (remove oil, rust, coating)
- Wear full PPE
6.2 Start-Up Procedure
- Turn on main power
- Insert key and switch to ON
- Start cooling system
- Open shield gas and set proper pressure
- Select material thickness preset
6.3 Welding Operation
- Gun angle: 30°–70° to workpiece
- Move smoothly and keep distance stable
- Avoid reflective surfaces and high-angle shots
- Check emission lights on gun and control panel
 | Sichuan Strongest Laser Technology Co., Ltd")
6.4 Shut-Down Procedure
- Stop welding and disable laser emission
- Keep cooling running for 5–10 minutes
- Close gas cylinder and release residual pressure
- Turn off key and main power
7. Best Materials & Applications
Best For
- Stainless steel, carbon steel, aluminum, copper, brass
- Thin sheets (0.5–8 mm)
- Kitchenware, doors & windows, signs, auto parts, furniture
Not Recommended
- Ultra-thick metal without high-power setup
- Highly reflective untreated metal
- Non-metal materials
8. Daily & Weekly Maintenance
Daily Maintenance
- Clean protective lenses
- Wipe the gun and workbench
- Check cables and hoses
Weekly Maintenance
- Inspect cooling water level and quality
- Test gas pressure and leakage
- Check gun alignment (if needed)
Important: No user-serviceable parts inside. All repairs must be done by official technicians.
9. Common Mistakes to Avoid
- ❌ Pointing the laser gun at people or reflective surfaces
- ❌ Using dirty or broken protective lenses
- ❌ Blocking cooling vents
- ❌ Disassembling the machine without permission
- ❌ Welding near flammable materials
- ❌ Ignoring PPE and safety rules
10. Final Beginner’s Checklist
Before you start welding:
- ☑ Full PPE is worn correctly
- ☑ Workspace is clean and safe
- ☑ Protective lenses are clean and intact
- ☑ Gas and cooling systems are normal
- ☑ Key switch is under control
- ☑ Fire extinguisher is ready nearby
Contact STRION LASER
📞 +028-85812068
🌐 www.strlaser-en.com
📧 str@strlaser.com