How to Adjust the Focal Distance for Handheld Laser Welding
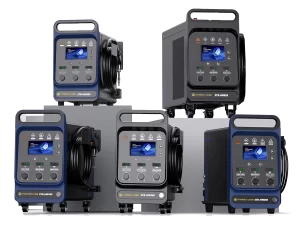
(Example: STRION LASER MASTER X60)
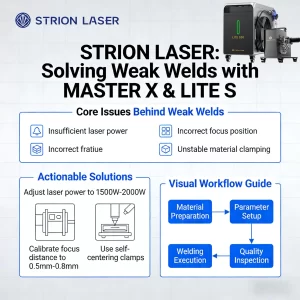
If the focal length is incorrect, the welding torch may generate heat but fail to achieve sufficient penetration depth. Precise focal length adjustment is crucial for ensuring stable energy concentration and consistent welding quality.
This guide uses the MASTER X60 handheld laser welding machine as an example to explain how to adjust the focal length step by step.
Why Focal Distance Adjustment Matters
A correctly adjusted focal point allows laser energy to concentrate precisely on the workpiece, resulting in:
- Proper penetration
- Stable molten pool
- Clean and continuous weld seams
An incorrect focal distance often leads to shallow penetration, inconsistent welding, or excessive heat without fusion.

Step-by-Step Focal Distance Adjustment
Step 1 — Safety Check and Preparation
- Secure the safety clamp to the welding workstation.
- Inspect the protective lens for dust, contamination, or defects.
- Check the red positioning laser and make sure there are no dark spots in the beam.

Step 2 — Prepare the Workpiece
- Place a stainless steel plate on the welding table.
- Ensure the surface is clean and stable for accurate focal adjustment.

Step 3 — Set an Initial Negative Defocus
- Loosen the torch rod locking nut.
- Push the torch rod forward to a negative defocus position.
- Place the torch nozzle directly against the stainless steel surface.
- Check whether the red laser spot is centered inside the nozzle.

Step 4 — Locate the Focal Point
- Activate the welding torch.
- Slowly and steadily pull the torch rod outward.
Visual and Audible Indicators
When the focal point is reached, you will observe:
- Visible metal sparks
- A clear, crisp welding sound
These signals indicate that the laser energy is correctly focused.

Step 5 — Lock and Confirm the Focal Position
- Tighten the torch rod locking nut to secure the position.
- Aim the torch at the stainless steel and emit the laser.
If a clear and continuous weld seam appears, the focal distance has been correctly adjusted.

Contact STRION LASER
📞 +028-85812068
🌐 www.strlaser-en.com
📧 str@strlaser.com